
Summary
What is hydroseeding? It’s a highly effective way to start a lawn by applying a seed-and-mulch slurry that improves moisture retention, speeds up germination, and creates uniform coverage. It delivers strong results across Northern Virginia and often costs significantly less than sod while supporting healthier long-term growth.
Table of Contents
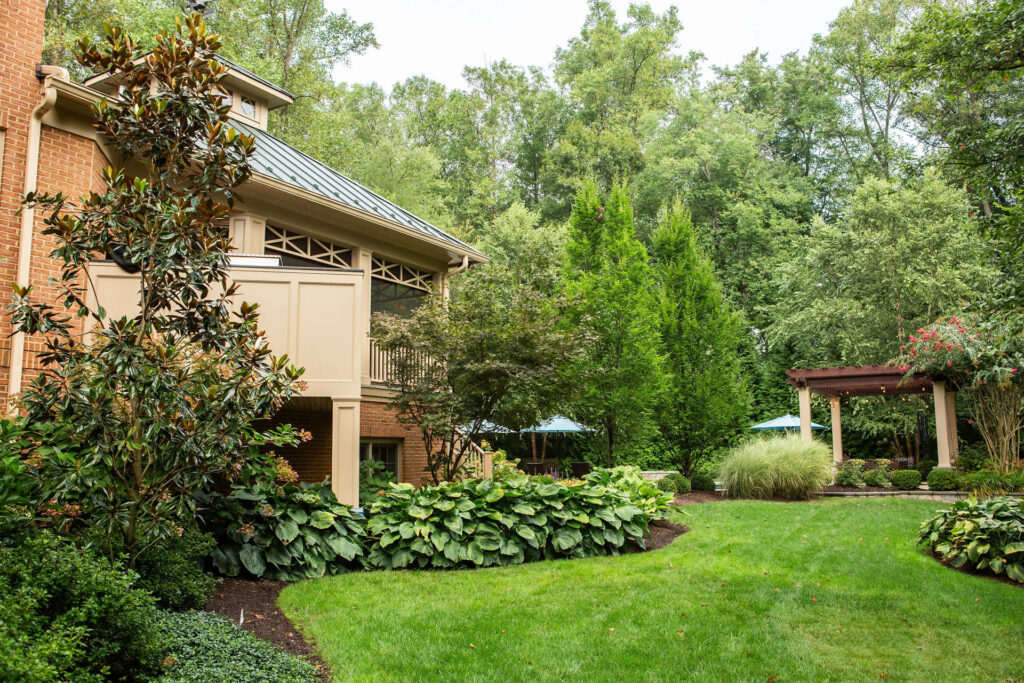
If you’re seeking a lush, resilient lawn on your Northern Virginia property, you may have heard of hydroseeding but wondered exactly what it means, and whether it’s the right choice. This guide is built to help homeowners across Great Falls, McLean, Vienna, and surrounding communities harness hydroseeding to achieve vibrant turf. In this article we’ll explore what hydroseeding is, how it works, why it can outperform traditional methods in our region, how much it costs, and how to give your new grass the best chance at long-term success.

Definition and Key Principles
Put simply, hydroseeding (sometimes called hydraulic mulch seeding or hydraulic slurry seeding) is a method of planting grass seed by spraying a mixture of seed, water, mulch, and fertilizer (and sometimes tackifiers) onto prepared soil. The term comes from “hydro” (water) + “seeding”, because the slurry is mixed with water and distributed via a specialised spray system.
Here are the core components:
Grass Seed
Chosen based on climate, soil, light conditions and intended use.
Mulch / wood-fiber or paper mulch matrix
Often a wood-fiber or paper mulch which holds moisture around the seed and protects it from environmental extremes.
Fertiliser or nutrient starter
Gives new seed a head-start in root development.
Water / mixing fluid
To carry the slurry and ensure a consistent application.
Tackifier or binder (optional)
Helps the slurry adhere to slopes or bare soil and resist wash-off.
Hydroseeding equipment
A hydroseeder tank + hose/boom to apply the mixture evenly.
Because the seed is encapsulated in a moisture-retaining matrix and applied uniformly, hydroseeding offers advantages in germination speed, coverage uniformity, and erosion control.
Why Hydroseeding Works Especially Well in Northern Virginia
Our region presents unique lawn-establishment challenges: variable soils, slopes, summer heat/humidity, spring storms, and shade/sun exposures that vary dramatically between yards. Hydroseeding addresses many of these issues:
Time-efficient establishment: Especially useful when you want a strong start early in the season and want to avoid long bare periods.
Improved moisture retention: The mulch in the slurry helps hold water close to the seed, so the germination period is less vulnerable to drying out.
Erosion and slope control: On steep grades or disturbed soils (which are common around new construction or rebuilding), the slurry acts as a blanket that holds seed in place even during rain or runoff. Research confirms hydroseeded vegetation is effective for slope-stabilisation. (MDPI)
Uniform seed distribution: The spray ensures even coverage across the area, reducing patchiness or missed spots.
Tailored seed mixes: Because the seed is blended and sprayed, we can choose the optimal grass varieties for Northern Virginia (cool-season grasses, shade tolerant types, drought-tough mixes)
Hydroseeding vs. Other Methods (Broadcast Seeding, Sod)
Let’s compare hydroseeding with more traditional alternatives:
Data Notes
Cost and timeline ranges in this chart represent typical residential lawn installations in Northern Virginia using professional services and common cool-season grasses (tall fescue and Kentucky bluegrass). “Time until results” reflects the point at which the lawn appears visibly green, not full maturity or traffic tolerance. Visual element proportions are illustrative and not drawn to scale.
Sources: Virginia Cooperative Extension. Turfgrass Establishment: Tall Fescue & Kentucky Bluegrass. Virginia Tech, updated 2023. Guidance on germination timing and early establishment. https://ext.vt.edu/lawn-garden/turfandgardentips/tips/Establishing-Cool-season-Turfgrasses.html
HomeAdvisor. Cost to Seed a Lawn (2024–2025 Data). Provides national and regional averages for broadcast seeding and hydroseeding, including price ranges per square foot and typical labor costs. https://www.homeadvisor.com/cost/landscape/seed-a-lawn/
HomeAdvisor. Cost to Install Sod (2024–2025 Data). Details sod material costs and professional installation pricing, typically $1.00–$2.00+ per square foot.https://www.homeadvisor.com/cost/landscape/install-sod/
HomeAdvisor. How Much Does It Cost to Reseed a Lawn? Updated 2025. National cost ranges for professional lawn seeding. https://www.homeadvisor.com/cost/lawn-and-garden/seed-a-lawn/
Turfgrass Producers International. Guideline Specifications to Turfgrass Sodding. Reprinted specification guide outlining best practices for sod installation and establishment. https://fastgrass.gr/files/guideline_specifications.pdf LawnStarter. Hydroseeding vs. Sod: Which Is Right for You?Updated 2025. Comparative overview of cost, speed, and performance of hydroseeding versus sod .https://www.lawnstarter.com/blog/lawn-care-2/hydroseeding-vs-sod/
Hydroseeding often costs more than broadcast seeding but significantly less than sod, and it achieves solid results faster than traditional seeding. Hydroseeding is often preferred over traditional grass seeding due to its ability to cover large areas quickly and effectively. For many Northern Virginia homeowners, hydroseeding hits the “sweet spot” of cost-versus-time-versus-quality.
How Much Does Hydroseeding Cost?
Let’s address the question on most people’s minds: hydroseeding cost. While prices vary depending on project size, seed blend, site conditions, slope, access, and soil prep, here is a general breakdown:
- On a typical residential lawn (say 2,500–5,000 sq ft) in Northern Virginia, a professionally-applied hydroseed might runs from an average of $0.10 to $0.26 per square foot, although sources vary.
- Hydroseeding a 10,000-square-foot yard typically costs between $1,000 and $2,600.
- Factors that push cost up: steep slopes, difficult access (gate/driveway constraints), remediation of poor soil, thick layer of mulch or soil amendments, premium seed blends.
- Factors that reduce cost: large contiguous area (economy of scale), flat terrain, existing soil in good condition, simpler seed mix.
- Compared to sod: sod can run substantially higher, often 3-10 times more per square foot than hydroseeding in many cases.
At Lucas & Clark Grounds Company, we always provide a detailed site inspection to give customized pricing, including soil testing, blend recommendation, irrigation readiness, and clear aftercare plan so there are no surprises.
The Science & Biology Behind Hydroseeding
To truly understand why hydroseeding works so well (and what can go wrong), it helps to dig into the soil, seed and root biology.
Soil Contact & Seed Germination
Successful lawn establishment begins with good seed-to-soil contact. Seeds lying on the surface or on a crust won’t germinate reliably. In broadcast seeding, this is often the weak link. inconsistent placement, seed washed away, or poor soil preparation. In hydroseeding, because the seed is suspended and sprayed, and the mulch settles into place, the seed is more likely to stay in intimate contact with the soil and receive uniform moisture and nutrients.
Moisture Retention & Mulch Effect
The fiber mulch in the slurry acts much like a blanket. It keeps moisture around the seed, moderates temperature swings, and protects the seed temporarily from birds and surface disturbances. A controlled study found that a hydroseed mix with fiber mulch significantly improved germination and biomass production and reduced irrigation water requirements on artificial slopes. Wood fiber mulch is typically the most effective and expensive option for hydroseeding due to its moisture retention properties, although there are various different options.
In Northern Virginia, where spring showers are common but soil can dry out quickly during early summer, that moisture buffer is a major advantage.
Root Development & Establishment
A healthy lawn is not just about surface grass blades. It’s about root depth, density and resilience. Because hydroseeding includes starter fertilizer and often higher seed densities, new grass can establish more quickly and anchor itself before stressful conditions like heat or foot traffic hit.
In slope-stability research, vegetation established via hydroseeding was shown to improve ground-cover and root characteristics on steep slopes, which speaks to the robustness of the method.
Soil Erosion Control & Environmental Benefits
On sites prone to erosion or runoff (common in our region after storms, grading, or new construction), hydroseeding offers an additional benefit: soil protection. The mulch suppresses direct raindrop impact and helps keep the seed in place. One review of hydroseeding noted this as a key advantage over other methods.
From an environmental perspective, hydroseeding uses fewer large sod rolls (which require removal from farms, transportation and installation) and reduces the need for repeat reseeding, which means less resource waste in many cases.
The Hydroseeding Process: Step by Step
Here’s how Lucas & Clark Grounds Company approaches the hydroseeding process for Northern Virginia lawns, broken down so you understand how each stage contributes to success.
1. Initial Consultation and Soil Assessment
We begin with a property walk-through: assessing soil type (clay, loam, sand), sun/shade exposure, drainage, slope, existing vegetation, irrigation readiness, and any access or obstruction issues.
We may perform a soil test (pH, nutrient levels, compaction). If soil is compacted, low in organic matter, or has poor drainage, we may recommend amendments or tilling first.
2. Site Preparation
This is the most critical phase. It includes:
- Clearing debris, rocks, roots, weeds.
- Grading or smoothing the surface if necessary.
- Loosening the topsoil (often top 2-3″) so roots can penetrate.
- Installing any required drain or erosion controls (for slopes).
- Applying lime or soil amendments if needed to adjust pH or nutrient levels.
3. Seed-Mix Design & Slurry Preparation
Based on site conditions and usage (kids/pets, shade, traffic), we design a seed blend, for example, tall fescue for durability, Kentucky bluegrass for lawn texture, and perennial ryegrass for quick germination.
Then we mix the hydroseed slurry: seed + fertiliser + wood-fiber or paper mulch + water + optionally tackifier and dye (for visual coverage).
This mixture is batched in a hydroseeder tank, agitated to keep fiber suspended, and pumped via hose for spray.
4. Application
The hydroseeder operator sprays the slurry evenly through a high pressure hose across the prepared area. On slopes or tricky terrain, extra care is taken to maintain consistent coverage, avoid overspray, and ensure the material adheres.
The green dye (often included) allows visual confirmation of full coverage.
Typical germination begins within 7-10 days under ideal conditions in Northern Virginia.
5. After-Care Instructions & Monitoring
After the application, we leave you with clear instructions on watering, mowing timelines, traffic restrictions, fertilisation schedule, and monitoring.
We follow up with a site visit or check-in to ensure everything is progressing as expected. Our value-add is staying engaged beyond spray day.
6. Establishment & Follow-On Care
Within 3-4 weeks you’ll notice significant grass coverage. By 8-10 weeks (depending on season and conditions) the lawn should be well established and ready for normal use and maintenance routine.
At that point we may recommend a follow-on fertiliser or overseeding for high-traffic zones.
Grass Variety Selection for Northern Virginia
Selecting the right grass blend is a key advantage of hydroseeding. In our region (USDA zones ~6b-7a), cool-season grasses predominate. Here are some of the popular and effective choices:
- Tall Fescue: Deep-rooting, drought-tolerant, good in sun or partial shade.
- Kentucky Bluegrass: Rich color and texture, thrives in full sun but requires more water and maintenance.
- Perennial Ryegrass: Fast germination and good wear tolerance, useful for high traffic areas (kids, pets).
- Fine Fescue (in shady or lower-maintenance zones): Tolerates shade and lower fertility.
With hydroseeding we can combine in custom proportions, e.g., 50% tall fescue, 30% Kentucky bluegrass, 20% perennial rye, tailored to your lawn’s specific micro-conditions. This flexibility is a major advantage over sod or generic seed blends.
Seasons & Timing: When to Hydroseed
Getting the timing right boosts your success rate. In Northern Virginia, two windows stand out: spring (late March to early May) and early fall (late August to early October). These periods offer moderate temperatures, adequate rainfall, and reduced stress on young turf.
Summer applications are possible but require more intensive watering and shade management. Winter applications (after the soil has cooled, and before frost) are generally not recommended for seeded methods in our climate.
Learn more about Spring hydroseeding
Hydroseeding for Soil Stabilisation
Because hydroseeding incorporates mulch and seed in one application, it also serves as an excellent tool for soil stabilisation, especially on slopes, disturbed areas, or new construction sites. Research shows hydroseeded vegetation improves root development and ground cover more rapidly on high-risk slopes.
If you’re dealing with erosion-prone areas or disturbed soil around your home, this benefit becomes valuable, especially if using an erosion control mulch (also known as Bonded Fiber Matrix), which is used on steeply sloped areas to help provide high levels of erosion control.
Learn more about Spring and Fall hydroseeding for soil stabilization
Lifespan, Expectations and Maintenance
Once your hydroseeded lawn is established, it behaves like any other good lawn, but the early weeks require care.
Timeline at a glance:
- Days 1–7: Slurry applied, you’ll see no green yet but you should see the mulch layer intact.
- Days 7–14: First green shoots begin to appear (varies with seed blend, soil temperature, moisture).
- Weeks 3–4: Coverage begins to fill in; watering is still frequent but you can begin tapering.
- Weeks 6–8: Grass roots are anchoring; light use may begin, first mowing often scheduled.
- Weeks 8–10+: Lawn is functioning, you can transition into maintenance (fertiliser, mowing, irrigation).
Ongoing Maintenance Tips:
- Watering: For the first two weeks, keep the surface consistently moist (2-3 light waterings per day in warm weather). After shoots appear, gradually shift to deeper, less frequent watering to encourage root growth.
- Foot Traffic: Limit heavy use for the first 4–6 weeks to avoid root disturbance.
- Mowing: Wait until grass height reaches ~3-4 inches; use a sharp blade; mow no more than one-third of the height at any cut. Most hydroseeded lawns are ready for their first mow after approximately 30 days.
- Fertilising: After 4–6 weeks a balanced slow-release fertiliser can support continued growth and colour.
- Weed Management: Because your lawn is new, avoid broad-leaf herbicides until after the second mowing and only if needed. Thick, healthy turf will naturally out-compete weeds over time.
- Long-term Care: Proper mowing height, seasonal fertilisation, aeration (every 2-3 years) and soil testing will keep your lawn looking its best and maintaining the advantage achieved via hydroseeding.
Common Misconceptions and Limitations
No method is perfect. It’s important to understand both the strengths and boundaries of hydroseeding:
- It is not instant turf. Unlike sod, you won’t have a fully usable lawn the moment the crew leaves. Expect several weeks of establishment before normal use.
- If soil is not properly prepared, success is limited. Hydroseeding cannot compensate for severely compacted soil, poor drainage, or very heavy shade without additional amendments.
- On very small patches (say under 500 sq ft), hydroseeding may be less cost-efficient than simpler seeding methods because the mobilisation of equipment may raise effective cost per square foot.
- Without proper after-care (especially watering) the benefits of the mulch and seed mix can be lost, the young grass is still vulnerable.
- Cost still varies. While hydroseeding is more cost-effective than sod in many cases, hydroseeding cost can escalate if site conditions are challenging (steep slopes, large rock removal, poor soil etc.).
- In extreme summer heat or drought, even hydroseeded lawns require vigilant watering. There is no substitute for consistent water during establishment.
Environmental & Long-Term Value Considerations
From a sustainability perspective, hydroseeding offers several advantages:
- Reduced waste compared to sod (less transportation, less farm-grown turf waste).
- Rapid establishment means less bare soil exposed to erosion or storm-water runoff.
- Custom seed blends allow selection of drought-tolerant species, reducing long-term water use.
- Healthier, deeper-rooted lawns hold soil, filter water and improve micro-ecosystem health around your property.
From a value-perspective: a beautifully established lawn improves curb appeal, enhances usable outdoor space, and increases the enjoyment of your property. Because hydroseeding gives you strong early performance and long-term resilience, the initial investment tends to pay dividends over many years.
Summary: Is Hydroseeding Right for Your Yard?
If you are preparing a new lawn, rejuvenating a large area, dealing with slopes or erosion-prone terrain, or simply desire a high-quality turf without the high cost of sod, hydroseeding is a very compelling option.
At Lucas & Clark Grounds Company we believe hydroseeding is often the “sweet spot” for Northern Virginia properties: faster than traditional seeding, more economical than sod, built for our local soils, slopes and climate.
When you begin your project with the right preparation, seed blend, application and after-care, and factor in the actual hydroseeding cost in your budget, you are positioned to create a lawn that will thrive for years and provide a strong, resilient foundation for your landscaping goals.
If you’re ready to explore your lawn’s potential with hydroseeding, we’d love to work with you. We’ll assess your site, recommend the right seed blend, provide a transparent quote and guide you through every step of the process.
FREQUENTLY ASKED QUESTIONS
-
Is hydroseeding safe for dogs?
Hydroseeding is generally safe for dogs once the slurry has had time to settle and dry on the soil surface. The mulch is typically made from wood fiber or recycled paper, and the seed blends used in residential lawns are not harmful when applied correctly. Most hydroseed fertilizers are “starter fertilizers,” which contain nitrogen, phosphorus, and potassium in low concentrations suitable for new turf. These products are widely used in residential landscaping and are considered safe when allowed to dry before pets return to the area.
The biggest concern is not toxicity but disturbance. When dogs walk or run across a freshly hydroseeded lawn, they can displace the slurry, damage small seedlings, or cause uneven germination. For the best results, keep dogs off the area until grass has rooted enough to handle light foot traffic. Most lawns reach that point around six to eight weeks after application, although some properties are ready a bit sooner depending on weather and seed type.
If you want to be extra cautious, ask your contractor which fertilizer they use. Some blends are marked pet-safe on the label. -
How long before hydroseeds are dead or dried out?
Hydroseed can dry out quickly if it is not watered during the early stages. The mulch layer holds moisture longer than traditional seeding, but it still needs consistent irrigation to prevent the seeds from drying beyond recovery.
Here’s a general guideline:
In the first two weeks, the seedbed should stay consistently damp. If it dries completely for long periods, germination may stall or fail in those dry spots.
If the slurry dries briefly between light waterings, it is not harmful as long as the soil beneath stays moist.
Hydroseed that dries out repeatedly for several days may result in patchy or uneven growth.
Once the grass is germinated and has developed early roots, it becomes more resilient. By week three or four, occasional dryness is less damaging. At full establishment (usually eight to ten weeks), the lawn behaves like any other turf. -
Can hydroseeding damage concrete?
Hydroseeding does not damage concrete. The slurry contains water, seed, mulch, fertilizer, and sometimes a green dye. None of these materials are corrosive to concrete surfaces.
However, the slurry can temporarily stain concrete because the dye used for visibility may leave a green tint if overspray lands on driveways, walkways, stone walls, or patios. This staining is cosmetic only and typically fades with sunlight, rain, and normal cleaning. Many contractors rinse nearby hardscapes after application to reduce the chance of visible streaks.
If you want to avoid any staining, you can ask your contractor to mask edges or rinse nearby surfaces immediately after the spray. -
Should I DIY hydroseed?
If you are going the DIY hydroseeding route, it’s important to take the time to learn how to do it correctly for the best results. In some scenarios, it may cost more to DIY than it does to hire a professional: DIY hydroseeding requires renting or purchasing equipment and materials, which can make it more expensive upfront, plus DIY hydroseeding is a big time commitment and physical challenge, as it can take upwards of 5 hours of constant work, depending on the size of your yard.
-
What are the disadvantages of hydroseeding?
1. It is not instant grass.
Unlike sod, hydroseeding still requires several weeks before the lawn can be used normally. Germination usually begins within a week, but full establishment takes 8–10 weeks.2. Proper watering is essential.
Hydroseeding depends on consistent moisture during the early stages. If watering is inconsistent, results may be uneven or require touch-ups.3. Soil preparation matters.
Hydroseed cannot fix underlying soil problems. Compaction, poor drainage, heavy shade, or low-quality soil will still affect outcomes unless corrected before application.4. Not ideal for very small patches.
For small repairs or tiny yards, hydroseeding may be less cost-efficient than spot-seeding because the equipment and truck must be mobilized.5. Erosion risk in severe storms.
Although hydroseeding provides better erosion control than dry seeding, a major storm in the first few days can still wash out portions of the slurry on steep slopes if there is no additional stabilization in place.6. Limited seasonal windows in some climates.
Extreme heat or cold can slow germination. In Northern Virginia, spring and early fall are ideal. Hydroseeding during midsummer or midwinter requires more management.